
Wednesday, 21st August 2024
LIGHTING BREAKDOWN - DILLI DARK
Construct a scene with minimal lighting


Dilli Dark was a feature I shot in December of 2021. It debuted in the 2023 Jio MAMI Mumbai Film Festival as part of the South Asian Competition after doing a string of festivals in Europe and the USA, and is gearing up for a nationwide release in the coming months. You can check out more about the film here: Dilli Dark
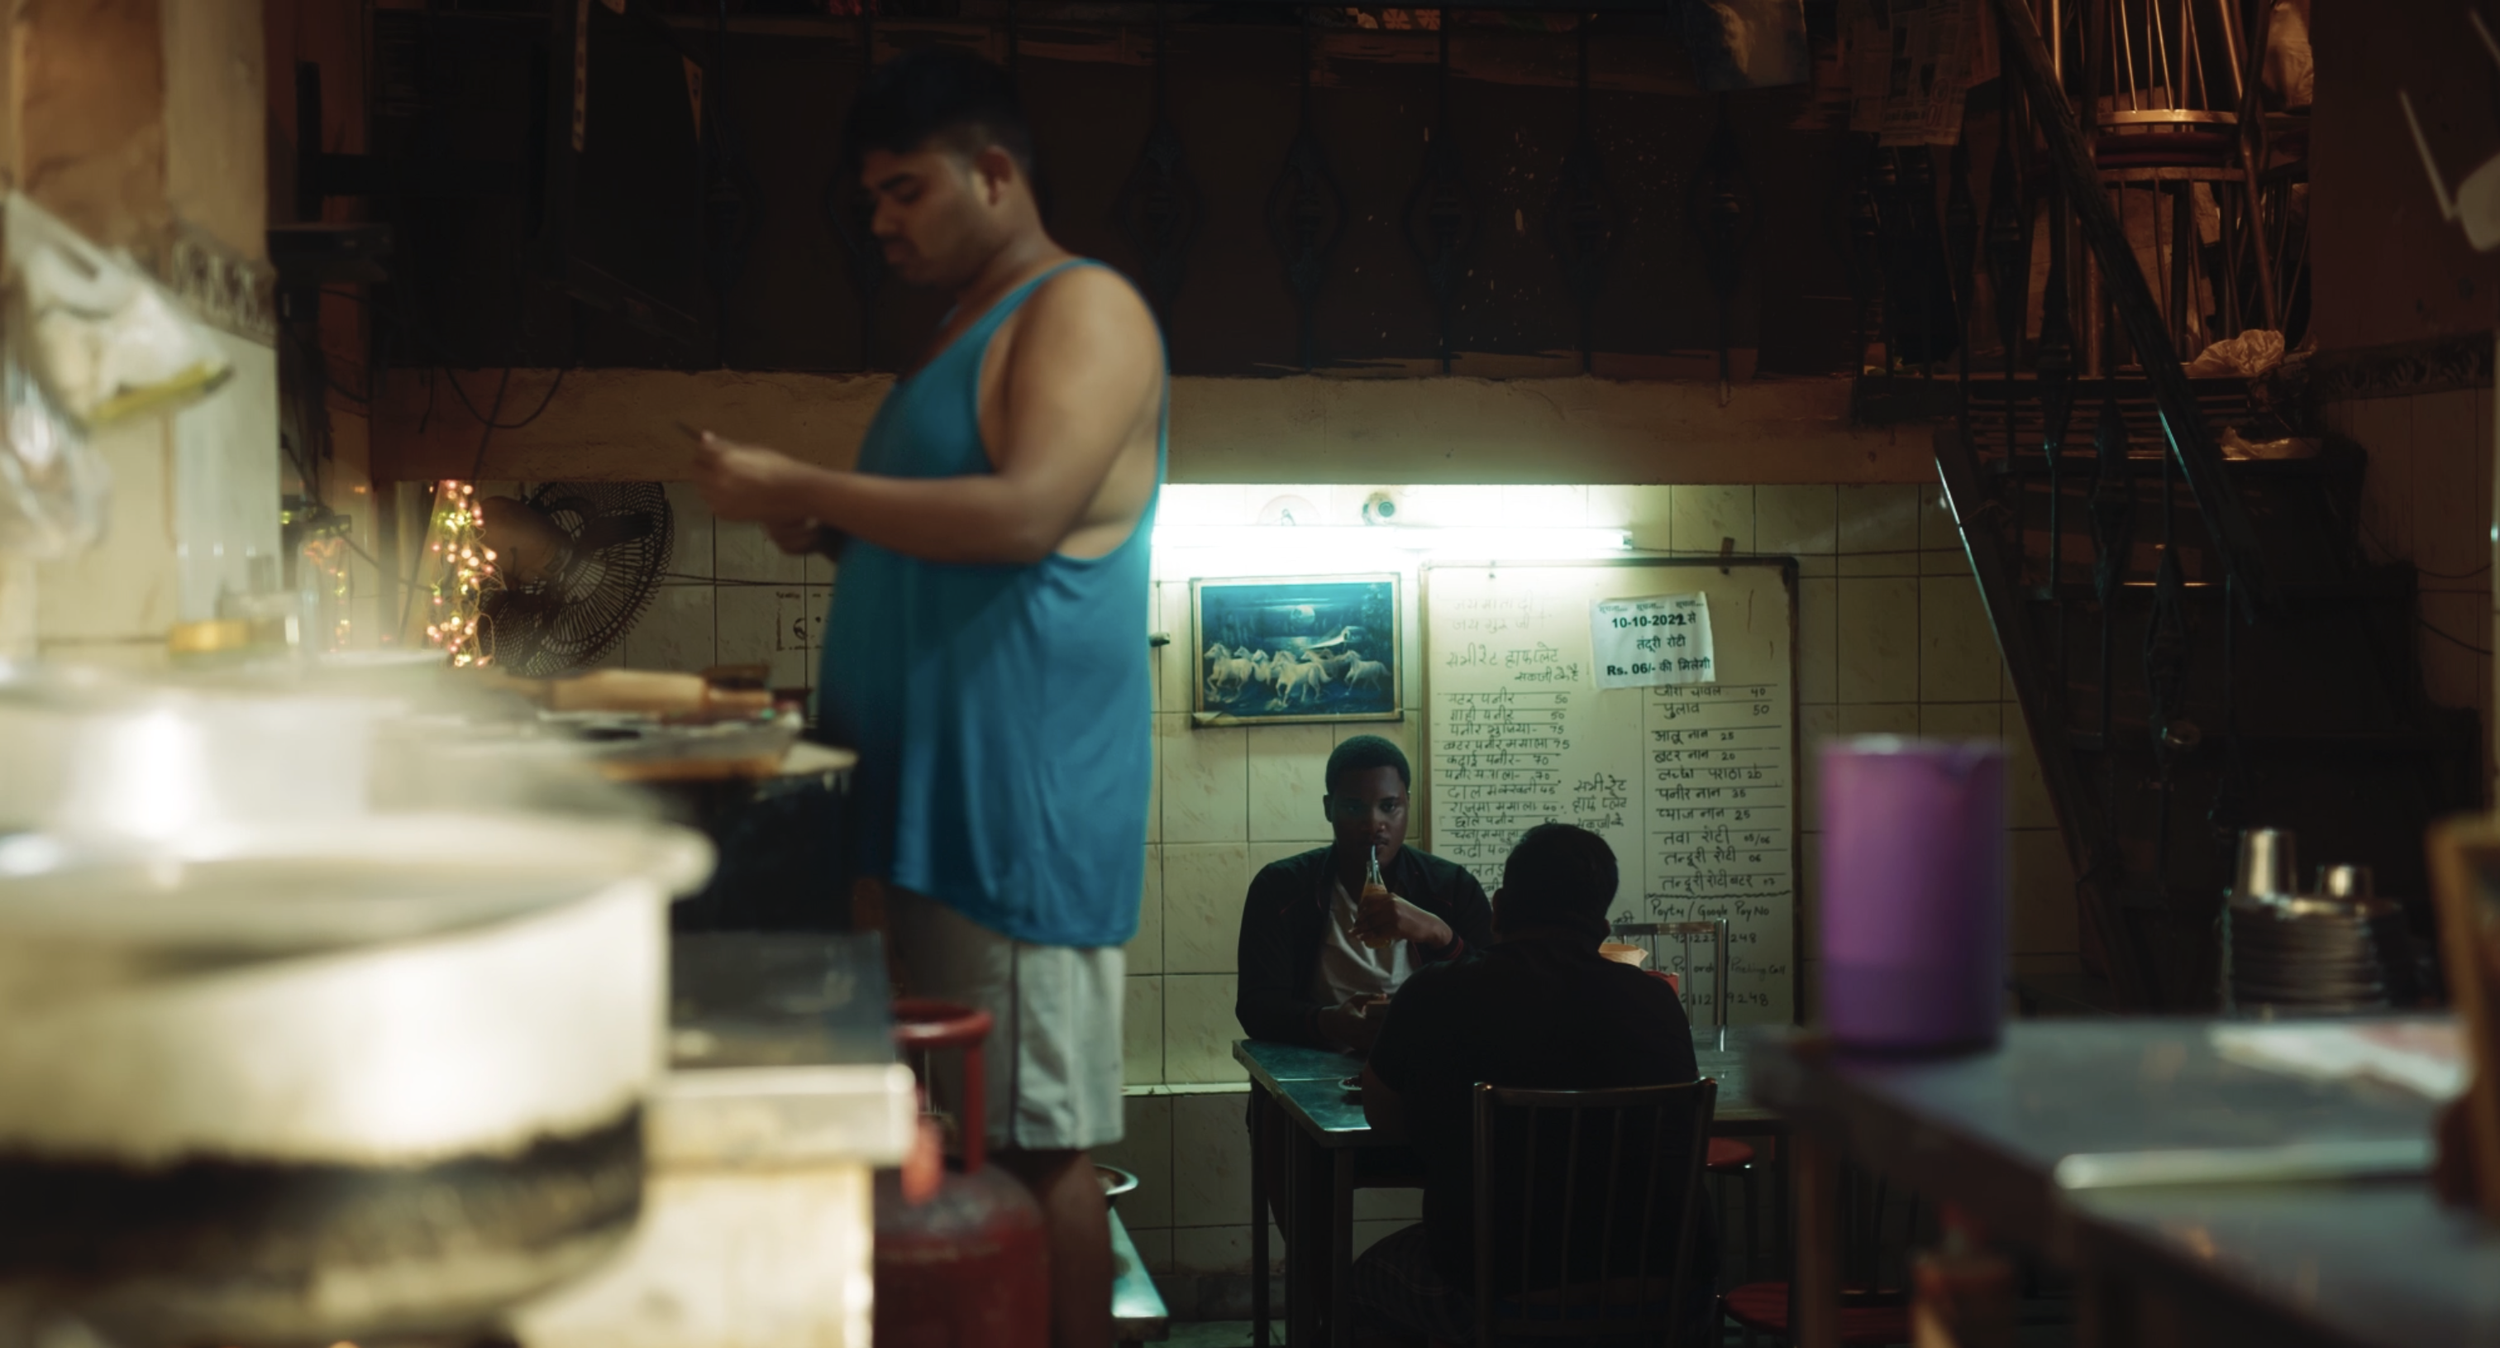
Directed by Dibakar Das Roy - this film is about a Nigerian national living his double life in the streets of Delhi. It is a satirical take on racism and the colonial mindset in Delhi. This scene, in particular, comes early on in the film and helps to set the tone and also has an interesting element - the power cut. It introduces a major character Debu (Shantanu Anam) to Michael (Samuel Robinson) as they sit in a local dhaba and chat. I decided to break down this scene for two reasons: Firstly, to understand the process behind constructing a scene like this from the perspective of a DP. How can one read the script, understand the subtext, and incorporate it visually without being too straightforward while still keeping it interesting to watch? However, I won’t be able to share the script pages yet. But will soon update this article as and when the script is released to the public. Secondly, I found the on-set experience of executing this scene interesting. Nothing is certain when you shoot in a live location like this in the heart of Delhi. So, I will talk about the various changes that occurred on set and how we adapted to that.
As Debu talks to Michael, it shows how common racism is in India. And more importantly how acceptable it is to be racist. That was what stayed with me as we prepared for shooting this. Now the challenge was how to carry this tone across visually. My initial idea was to have a stark contrast between the two looks. And for that to happen the area had to be lit by practicals or something motivated that we can assume runs on electricity. That leads to the look when the power is cut. How dark should we go? We needed a space that was dark enough even with natural light coming in. Another challenge was to light faces in such an environment because it did have a bunch of dialogues. Also, I didn’t want to feel the characters getting lost in darkness. Looking back now, I never really focused on solving these problems for us. We simply adapted to the situation we were in, stayed true to the story and things fell into place.
The Location:
I want to say we got lucky with this place, as this wasn’t our first choice. We initially planned to do it in a much smaller place. But the owners backed out at the last moment and we somehow got through to this, and we loved it! It was full of these amazing elements that we wanted to incorporate. We quickly discussed the blocking on the recce and finalized the frames. We tried to keep it simple shots-wise as it was a longish scene on a jam-packed shoot day. We locked on an axis to have the Master shot and 2 Mid Close-ups for coverage of dialogue. But since there was a power cut in the shot, it became 6 setups. We later also added an establishing shot and an insert.
I also had a conversation with the art department about the practicals. We wanted to change the bulb behind the table to a tubelight. I wanted the light to have a green tint so we asked them to source an old fluorescent tubelight. Having this led to a happy accident on set. More on this later. We knew it would be difficult to control so had also kept some ND Gels handy.
Also on the recce, it was important to identify the exposure level of the natural light coming in and also the reflective reading of the exposure outside when looked at from the table. I don’t remember correctly but it was approximately 4-5 stops more than the interiors when checked with the lights off inside.
The Tech and Team:
We had a package done for lights and camera for the whole shoot. This was modified according to shoot days depending on the scene. On the recce, we were informed that this location will not allow us to bring in a generator van and we will have to manage with a 7kw portable generator. The sound team did raise some eyebrows but we figured it out :p
My team on this one was 1st AC - Abhishek Rai, 2nd AC - Shubham Rohra and Gaffer - Rahul from Flamingo. As this was my first long format in Delhi, Abhishek and Shubham were crucial in helping to choose the vendors and also gave me a good vibe check of the city. Abhishek dealt with the production to get things sorted before the shoot while Shubham helped me with communication on set. The light diagrams in this article were designed by Shubham too. Both were coming fresh from a film school so very hands-on and didn’t have any pre-set notions about how things are done on set. This was a great asset, as I was also in the process of figuring out how to approach this film. We figured out ways to plan and execute which worked for us. I like to work very intuitively while lighting and always go for what my gut says. Sometimes even a misplaced light can create a look that I like and I will retain it. That doesn’t mean we didn’t prepare enough, just allowed a little more room to change things around. Rahul was a pleasant surprise too. I’ve never had such close collaboration with a gaffer earlier on set. He is one person who’s always next to me, predicting my next move and almost always getting the work started without me asking. Having an extra set of eyes and being so involved in the shoot is always a good feeling. Rahul had a great temperament which matched mine and his team was completely in sync with him. I felt I could experiment more with the lighting just because the team was so fast. Best Boy Akshay too was another incredible resource on set. Since working with LED lights, I’ve faced lots of technical challenges in terms of remotely operating them or just setting up the light to work remotely. He made my life simple on set by taking care of the remote operation. Akshay was really street smart and if there was a spot that I wanted a light rigged on, he would figure out a way.
(From Left to Right)
Abhishek, Shubham, Me, Chiranjit(Production), Rahul, Akshay
We chose to go for the Sony Venice for this film primarily because of its excellent low-light capabilities. We anticipated shooting in situations where we wouldn't have much opportunity to set up additional lighting, especially for the nighttime scenes where I wanted to capture the energy of the city. It also helped with the exposure during the power cut portion of this particular scene. Rialto was added so I could go handheld and be free from carrying the weight of the body. The lenses were a tough choice but I remember going for this kit because I thought I’d get the flexibility to have 10 focal lengths. Looking back, I believe this was a better choice than opting for a 5-lens kit of Supreme Primes. On set, we could easily swap from a 24 to a 28 instead of going to a 35. The subtle changes in focal lengths allowed me to experiment with various scenes and be closer to what we desired to express. Also, the 14mm on this kit is a brilliant lens. We added an Ergo rig to allow me (a 5ft 6 inch guy) to shoot Sam the actor playing Michael who’s almost 6ft 2 inches tall. It worked well and was super smooth for handheld shots compared to an Easy Rig.
We reached the location at around 11 am on the shoot day. We had a big night scene to be shot later, so we needed to finish this location before 7 pm and move to the next. The idea was to start with the wide establishing shot and then move on to the Master two-shot and mediums. There was a chance that we’d lose the sun by the time we wrapped this scene. So had to prepare for a night for day situation too.
Execution:
The first thing that the art department did was to get a tube light fixed right behind the table. As I was setting up the camera, I asked my team to put some ND Gels on it to control the exposure. The NDs also contribute to adding a green tint to light which I really liked. Next, we set up two main lights - An M18 from outside creating a sun patch in the foreground and an RGB Tube just on the right of the table to have a little wrap on Mike’s face. We also put a baby on the loft to make that entire area warm. We then had an LED Matte rigged on the ceiling near the counter to increase the ambience of the space. This we retained throughout the scene. We only took this shot for the beginning and ending portions of the scene. So the power cut bit was avoided in this.
The Master:
As we moved to the master shot, we needed to set up the lights such that a power cut could be done and reversed on cue. The most efficient way to approach this on a budget was to connect all the lights we wanted to turn off to one power source. We decided that it would be 4 lights - The tube light behind the table, the practical on the picture on the wall, the tungsten light from the loft and the other LED Matte that we had put on the ceiling for ambience. Getting all the wires in one place was tricky, but the team got it done. We then adjusted the M18 outside to make a patch deeper into the shop. There was a branch or some foliage put in front to break it down slightly. There was another RGB Tube added right on top of the table, but we later decided against it as it was a battery-operated light and would be difficult to switch off on cue. Instead, we added a skypanel from outside the shop centred directly at Mike for some exposure on his face. I was not happy with the exposure on Shantanu’s face. But after seeing the result I was pleasantly surprised. The Venice could retain so much detail on his face that we didn’t have to light him separately in the master. The camera over here was still rated at 500 ISO which is the base. Later in the shot he also holds up a phone so that too helps to see the expressions on his face. Cheers to Shantanu Anam, he had to hog a lot of biryani that day.
While experimenting with the power cut there was a happy accident that I mentioned earlier. The tube light placed behind the table started to flicker when switched on. Both I and Dibakar happened to see that on the monitor. We decided to incorporate this flicker into the shot during a crucial line. Someone from my team had to be on the plug to make sure it kept flickering till we wanted it to.
Medium Shot #1:
Even though we were running out of daylight by now, we decided to shoot this axis first. The entire crew would have to clear for us to shoot the other axis and we would have anyway lost the light by then. So assuming we anyway have to light the exterior to look like day, I asked my team to prepare that part in advance for the next axis.
The setup on this one couldn’t get any simpler. This is why it was so important to get all the sources in the right place initially. I just had to diffuse the sky panel hitting Mike from outside and probably change the angle for some shape on his face. We also added a few bounce cards on the left to fill in some shadows. Everything else was left as is. This shot was on a slider. The camera was still rated at 500 ISO. I was initially worried about him being so close to the wall. But having tiles and all these elements helps this angle to not look flat.
Medium Shot #2:
When we finally arrived at this axis, we had lost all the ambient light outside the shop. Once the camera was mounted in position I checked in the monitor and figured that it would be impossible to get exposure and would have to light everything. I switched the camera’s base ISO to 2500. We had done some testing for this setting before the shoot started and noticed that the noise levels were quite manageable. The only drawback was that you have less range in the highlights and get clipped easily, which wasn’t a problem in this scenario. We added another Skypanel outside and centred it on the building in front of the shop. The other 2 lights, M18 and the Skypanel were moved to the side but continued from a side angle.
For the interior, I used the existing practical tube for the part where the lights are on. I don’t remember even using any diffusion as Shantanu was wearing glasses and it would’ve shown. For the power cut, we added another RGB tube on camera right. This was set to a warmer temperature and bounced to the ceiling. This helped lift the shadows on his face slightly. This was a very subtle addition, as later on during the power cut he held a phone too. I also used that for some light on his face. Since the camera was rated at 2500, even the phone had to be dimmed down cause the light was too much. The camera was mounted on the slider again and the flicker effect was used too.
We did shoot a couple of inserts after this, but that’s about it. After this, the relationship between the characters is well-established to the viewers. We also get to know about Mike’s fears and experience the power cut all while keeping the scene interesting.
I hope this article helped you to understand the thought process behind executing a scene like this from script to screen. Every decision, starting from initial testing to the day of the shoot had a part to play in this. Not just this scene, filmmaking in general is all about these decisions. Even when you think you don’t have control or access to resources you can still make a good film if you have a good story rooted in the idea that you want to communicate. Please leave your feedback on how you felt about the article and suggestions if any.